


Wondering what to upload for your LinkedIn profile picture? It’s definitely worth some thought.
Why?
- When people visit your profile, it’s one of the first things they’ll see.
- It’s visible in the feed every time you leave a comment.
- When potential clients are scrolling through the search results to decide who to hire, it can make or break your chances.
If you’re not sure where to start, here’s a Canva tutorial with a free template. Learn how to choose the right image, brighten it, add a solid background color, and add a border.
LinkedIn profile picture Canva tutorial
Ready to create an awesome new LinkedIn profile picture? Let’s do it.
Step 1: Open Canva
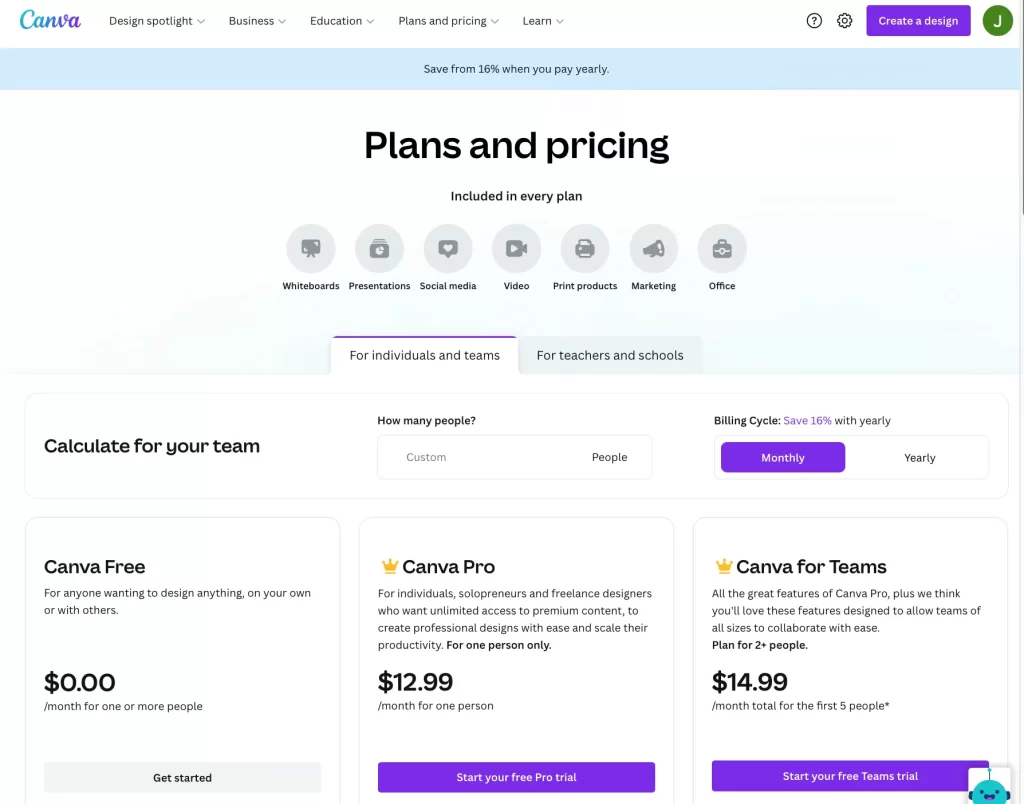
Canva is a user-friendly program that makes basic design easy for non-designers. Everything is drag-and-drop and there are templates that can serve as guides. The best part? The base plan is free!
To get started, go to Canva.com, choose your plan, and create an account. If you already have an account, simply login.
(*Note, to add a background color to your profile pic, you’ll need the Pro plan. You can try it for free with the trial offer.)
Step 2: Create a design canvas
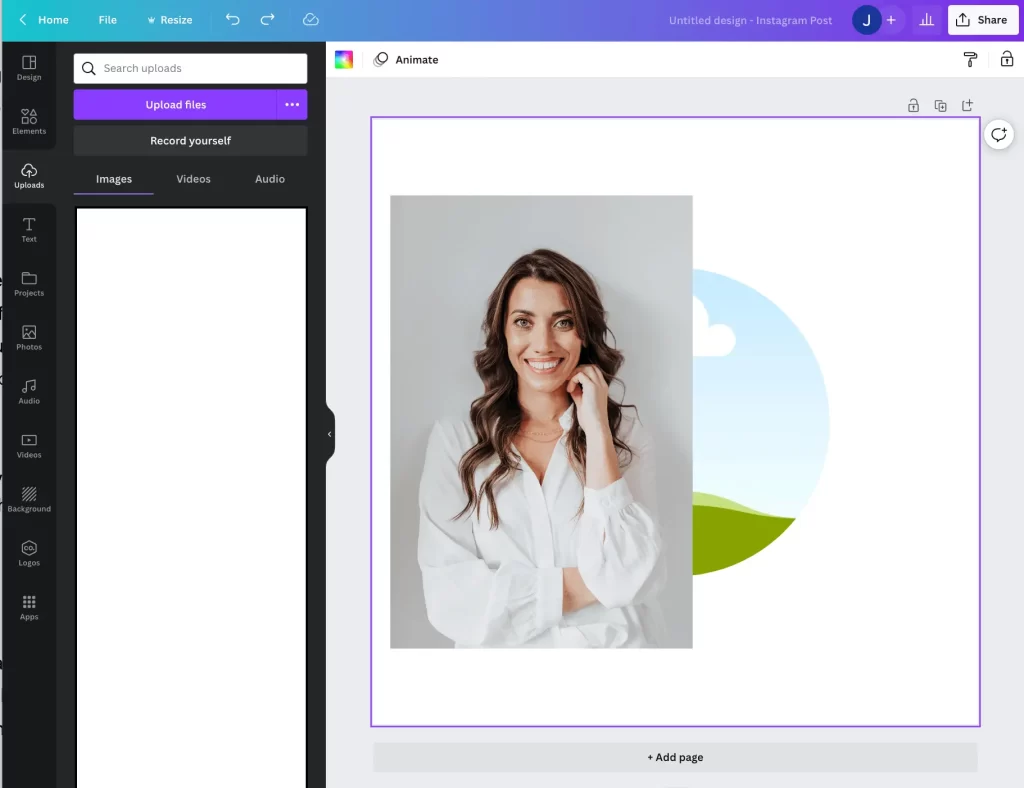
Once you have a Canva account and sign in, go to the upper right-hand corner and click “Create a design.”

A drop-down menu will appear. Click “Instagram Post” and it will give you a 1080 x 1080 pixel canvas.
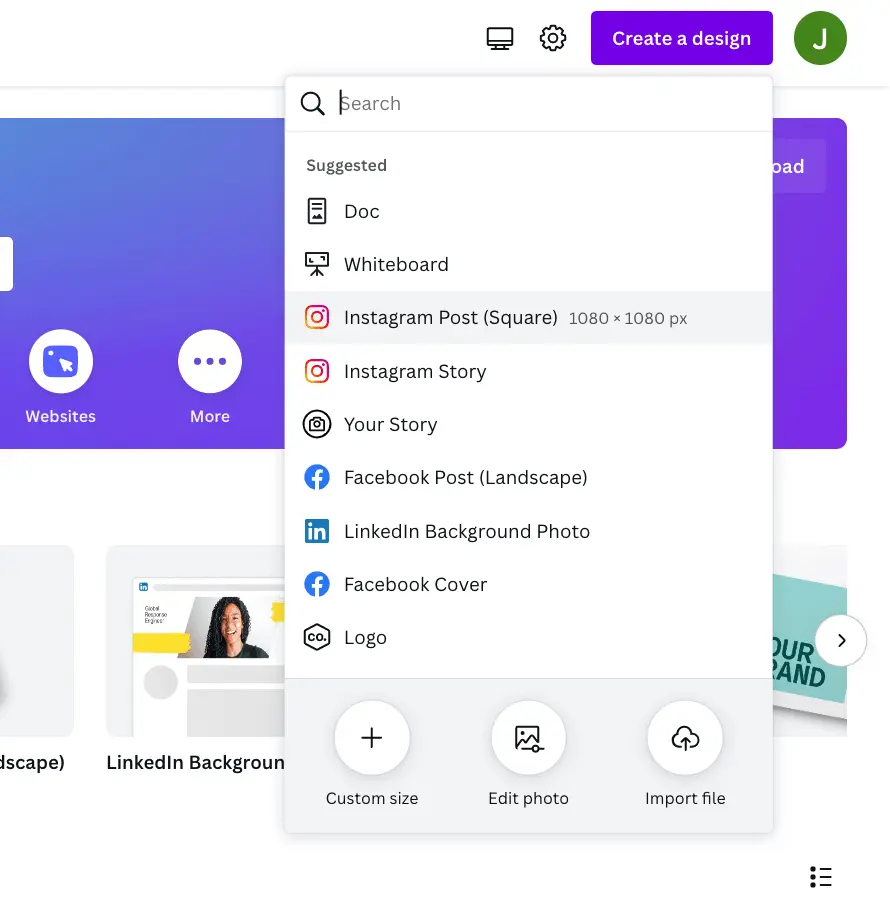
You should see this:
Step 3: Add a round photo frame
Next, go to “Elements” on the left-hand menu and type “frame” into the search bar. Look for the circle frame with a picture of the sky and grassy hills. When you click on it, it will be added to your canvas.
Want a shortcut? Check out the free profile pic template here.
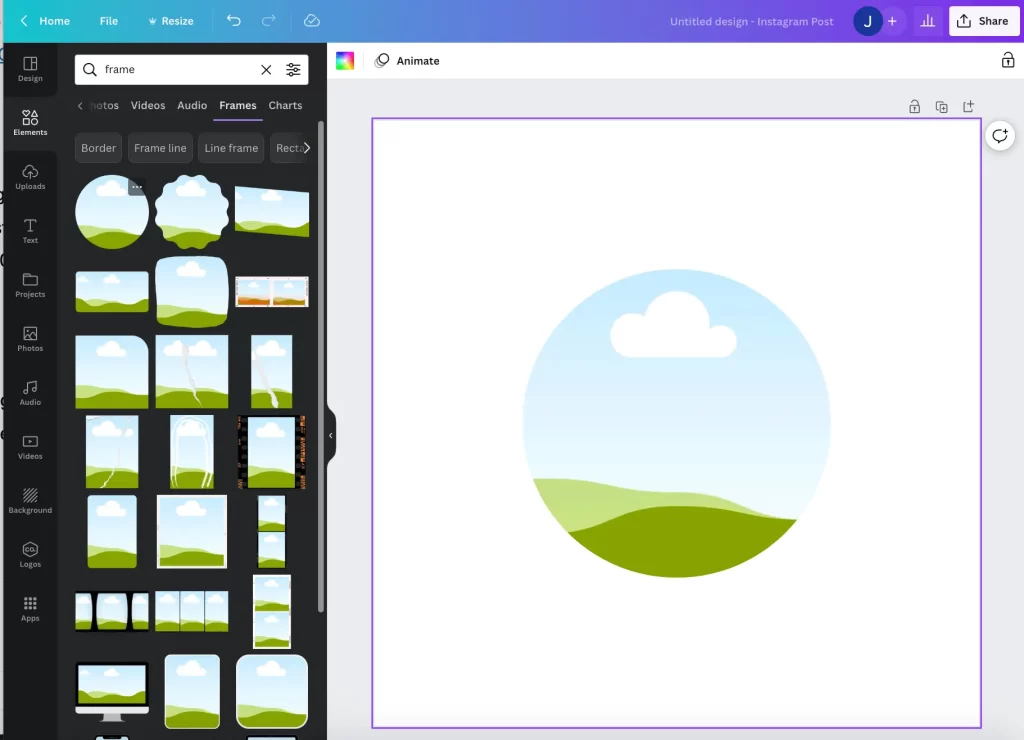
Frames are designed so that when you drop pictures into them, they automatically fill the space. You can then adjust the picture as needed.
Step 4: Upload your photo
With your frame ready, it’s time to upload your photo. Pick a well-lit photo that shows your whole face from the front view. It’s best if you’re looking at the camera and smiling (unless your brand is built on you being smoldering or punk rock or something). But, in most cases, a smile gives off a friendly, welcoming, and professional vibe.
A few other tips:
- Make sure your whole head is in the photo (e.g. the top of your head isn’t cut off).
- If you can see your shirt, ensure it gives off the right impression. A business casual shirt often works well.
- Choose a photo that’s not fuzzy, the clearer the better.
Once you have the right photo, go to the menu on the left side of the page and click “Upload.” Then, click the purple “Upload files” button.
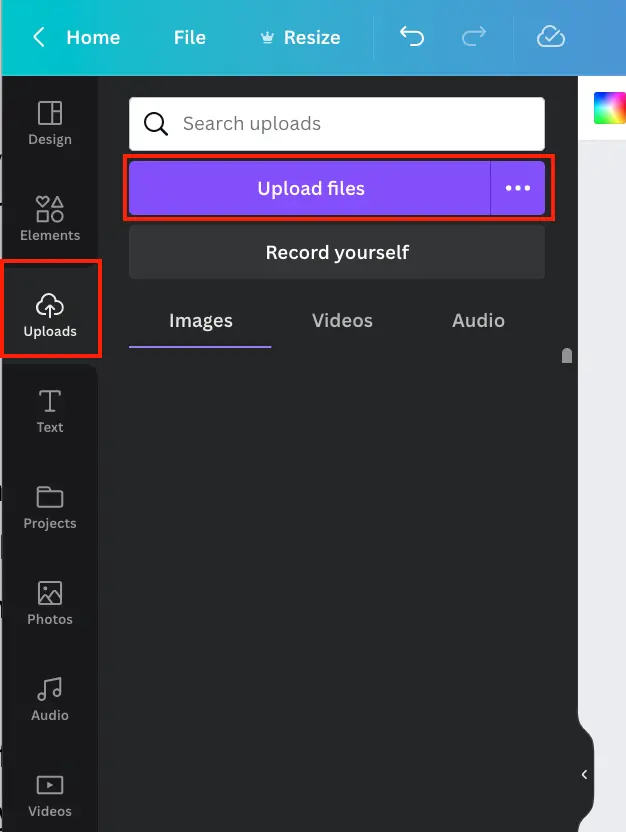
A window will pop up and you can select the photo you’d like to upload from your computer. Once selected, it will upload into the images section. You can then click on the photo and it will show up on your canvas.
Note: If you want to add a background color to your profile photo, jump ahead to step 6.
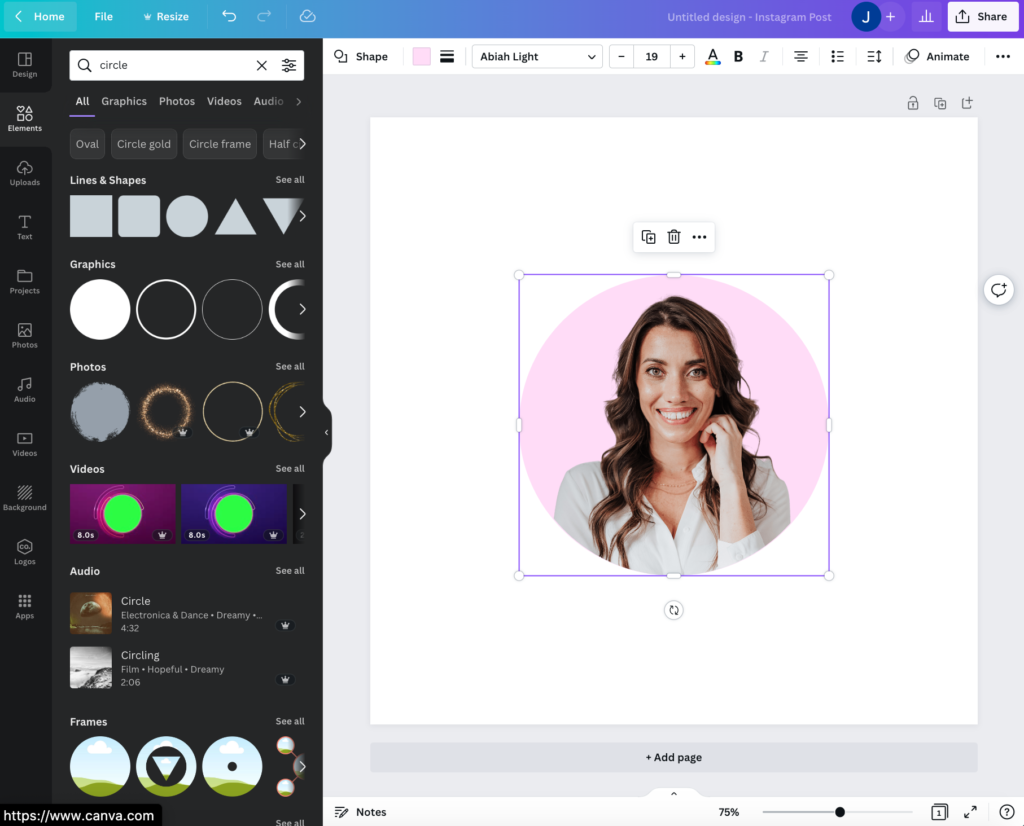
Step 5: Drag your photo into the frame and adjust
Once your photo is on the canvas, drag it into the frame and it will pop into the circle.
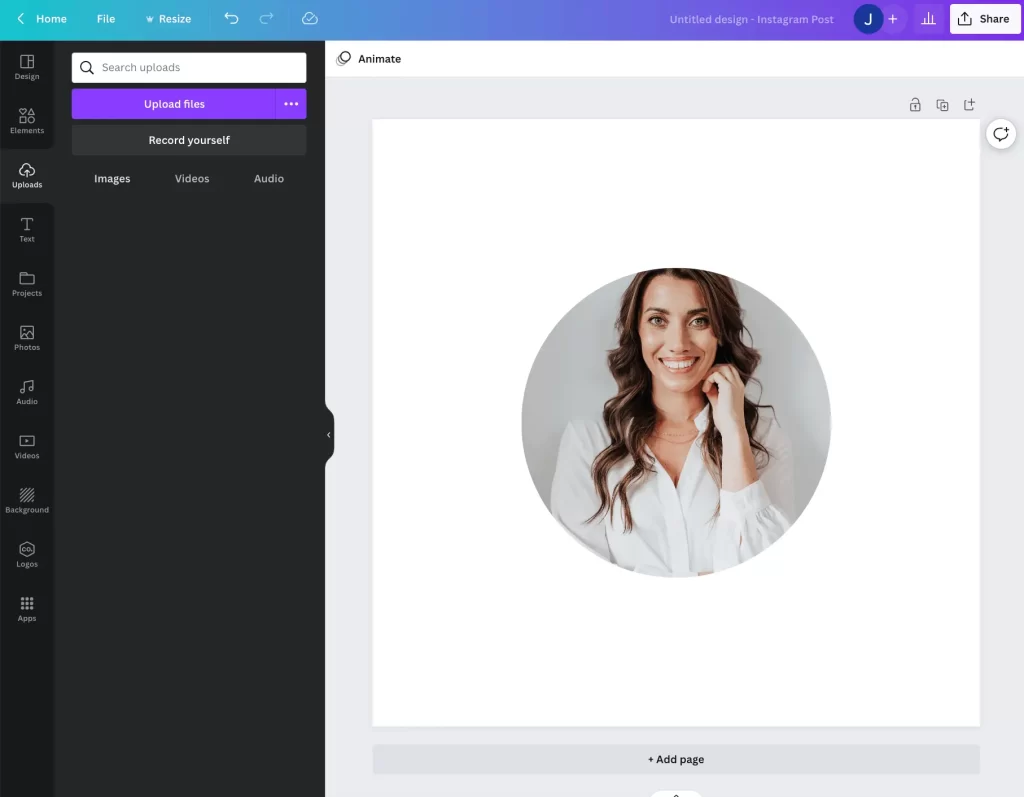
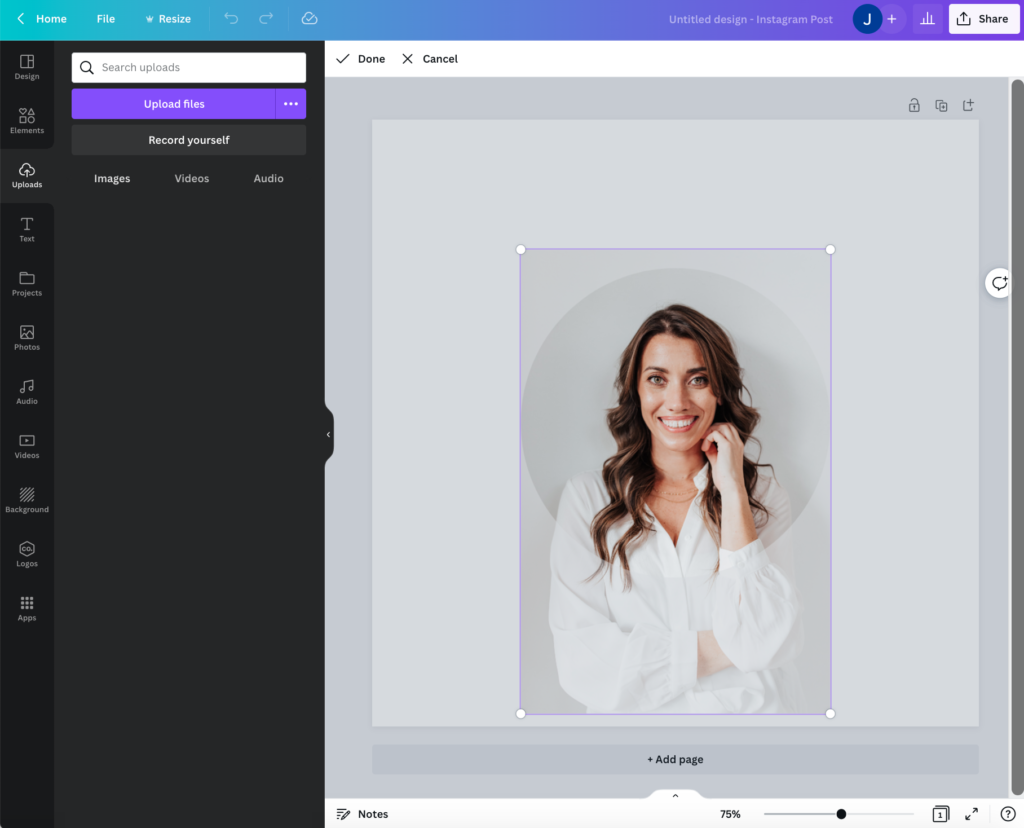
You can then double-click on the photo to make adjustments.
Once you double-click, the whole photo will appear and you can click on it to drag it around. For example, I dragged my picture down so the top of my head wasn’t cut off.
Step 6: Brighten the photo
If your photo is a bit dark, you can brighten it up in Canva. Click on the photo and click “Edit image.”
In the left-side menu, you’ll see an option for brightness. Adjust it up or down as needed. Be careful not to go too bright as you don’t want to look unnatural or washed out.
You can also play with the other image settings if you’d like.

Step 7: Add a colored background to your LinkedIn profile picture
If you look around LinkedIn, you’ll notice many people have colored backgrounds instead of natural ones. This can help your photo stand out in the feed and better align with your brand.
However, it will require Canva Pro (for $12.99 per month).
To get a colored background, follow these steps:
(Tip: You can skip steps 9-11 and 14-15 with the free profile pic template)
1. Delete the existing picture from the frame (if you added one already).
2. Add your desired photo to the canvas.
3. Click “Edit Image.”
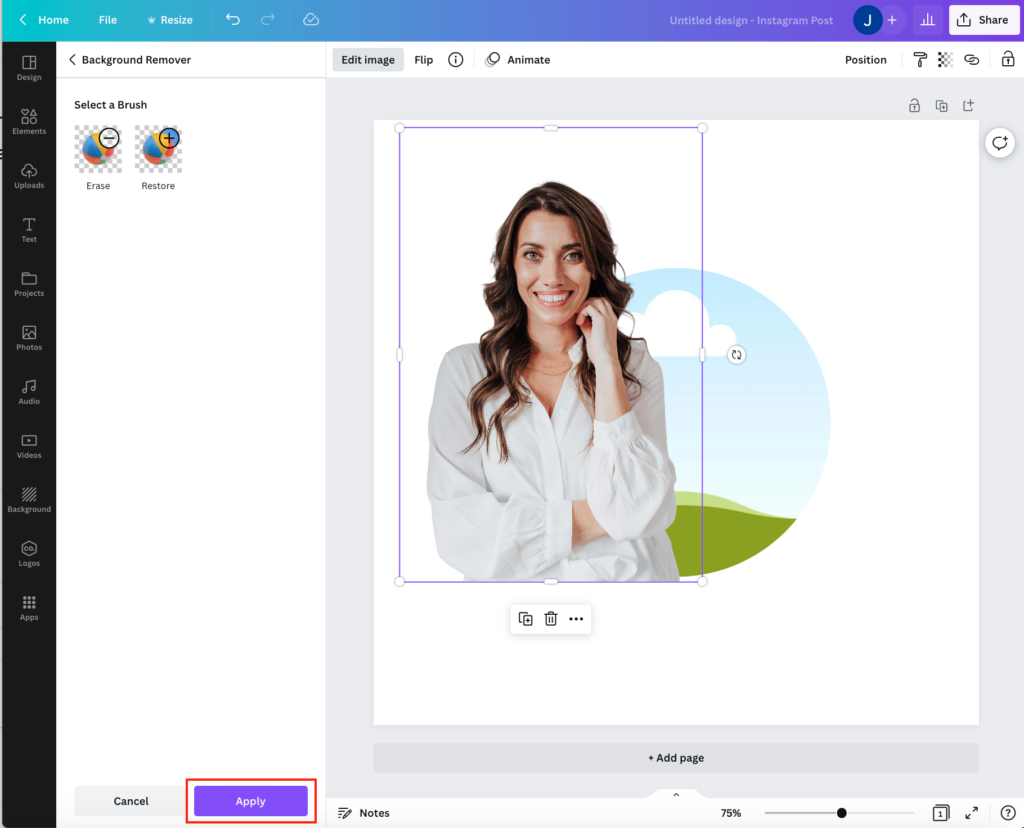
4. Click “Background Remover” (this is the pro feature).
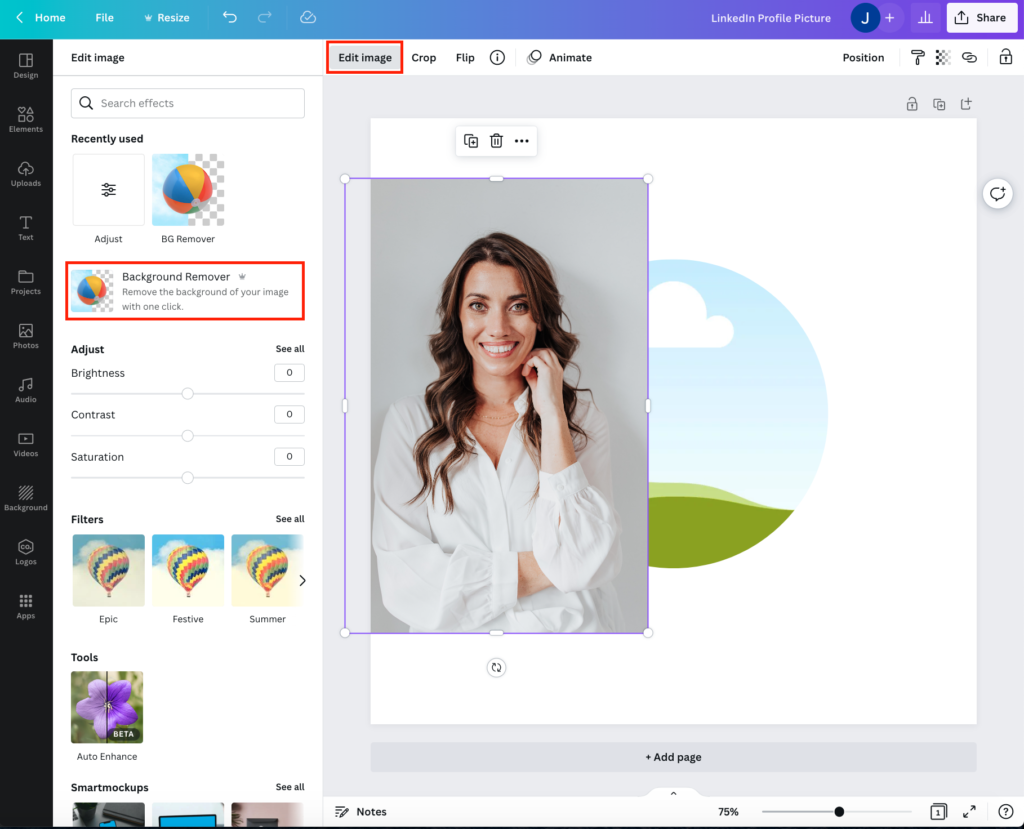
5. Wait a few seconds for Canva to remove the background.
6. Click “Apply” (Note: You can make adjustments with the erase/restore tools if too much or not enough was removed ).
7. Drag the photo to the frame.
8. Double-click the photo, then single-click to drag the photo up or down (if adjustments are needed).
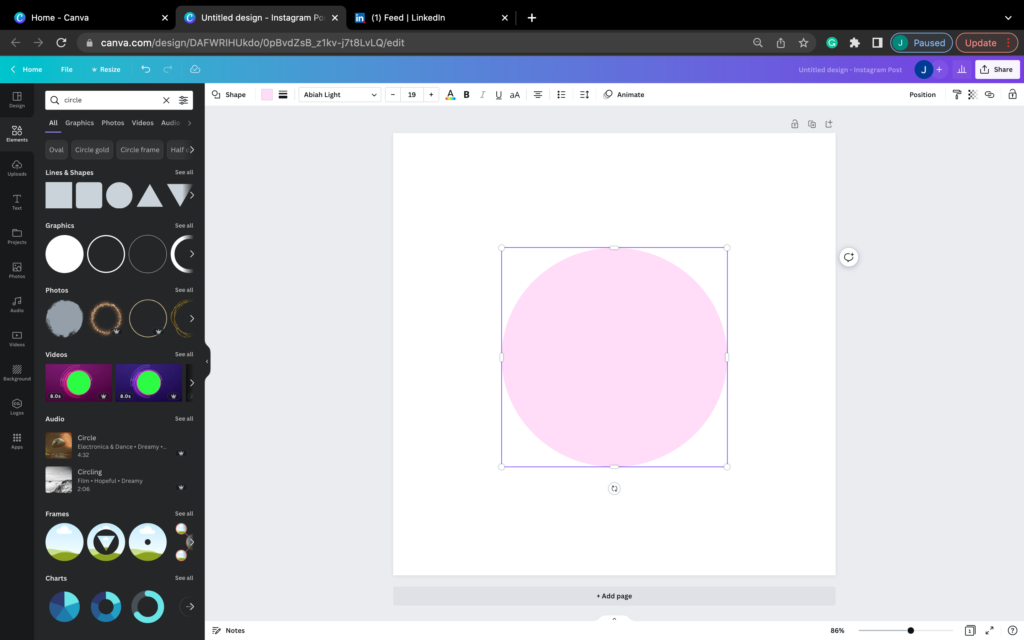
9. Click “Element” from the left-hand menu.

10. Search for “circle” using the search bar.
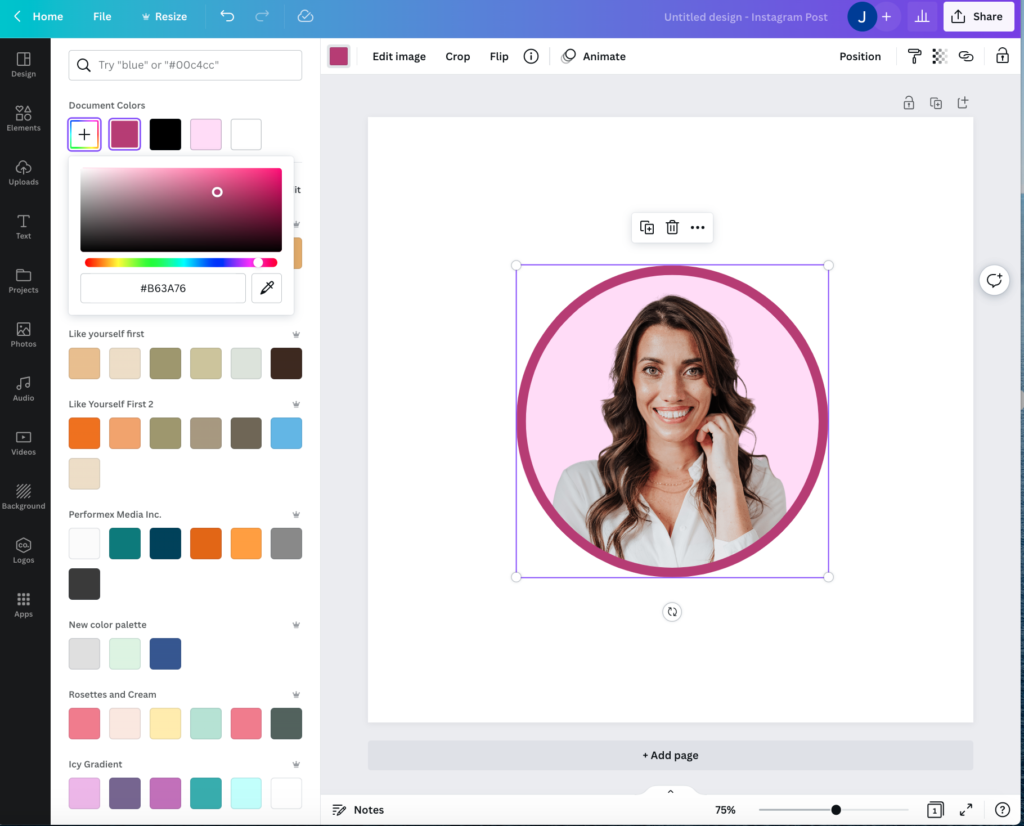
11. Select the filled-in circle from the “Lines and Shapes” section
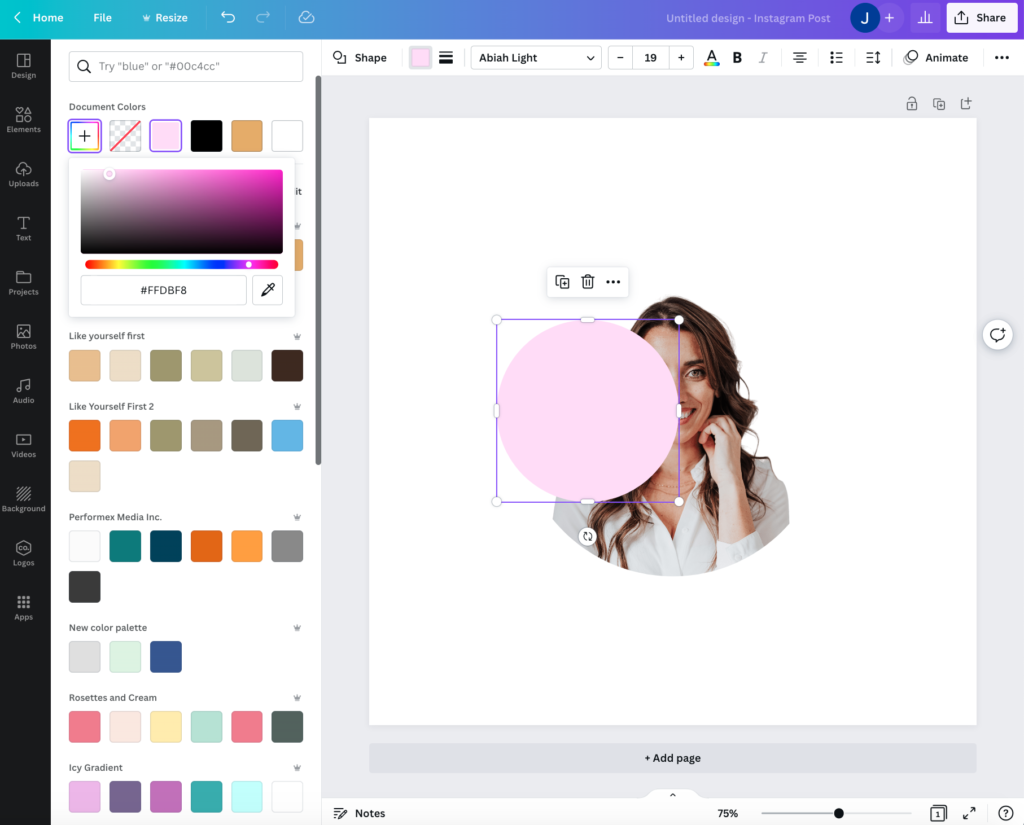
12. Click on the circle and then click on the box showing its color
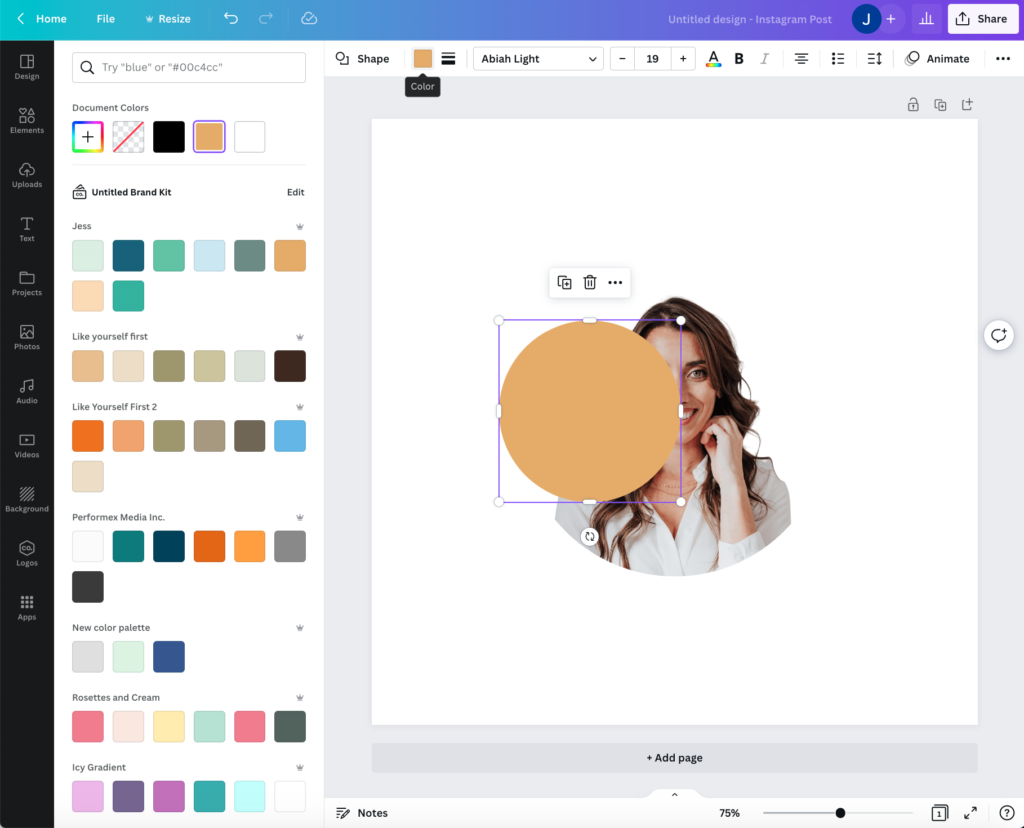
13. Click on the plus symbol in the upper left-hand corner and pick the color you want (or add a color code).
14. Now adjust the size of the circle so that it aligns with your frame (you can use the bottom of your picture as a guide).
15. Then, click “Position” from the menu above the canvas and select “Backward.”
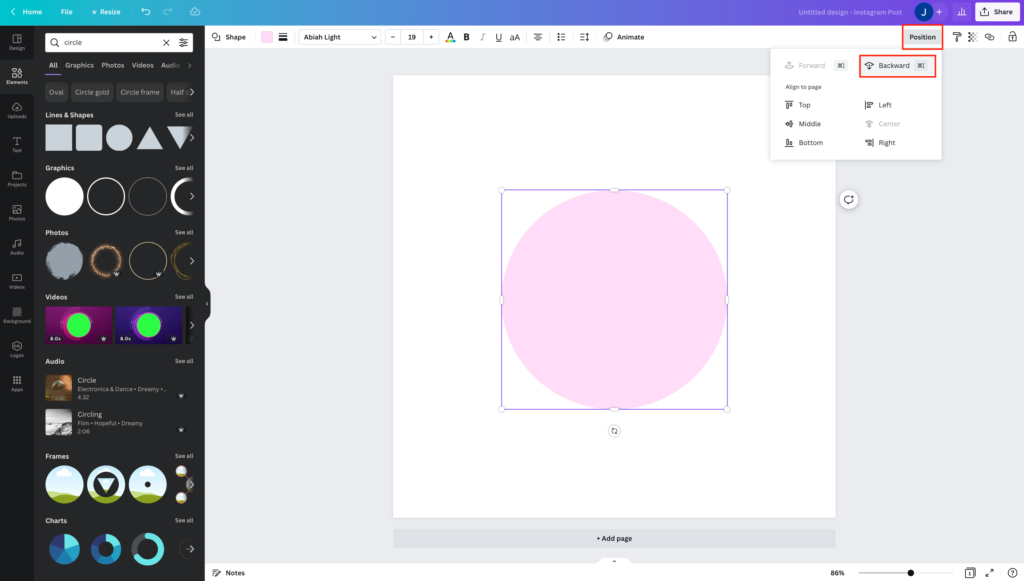
16. Wah-lah! You’ll have a profile picture with a colored background.
If your background and picture aren’t aligned. You can adjust your picture to line up better at this point.
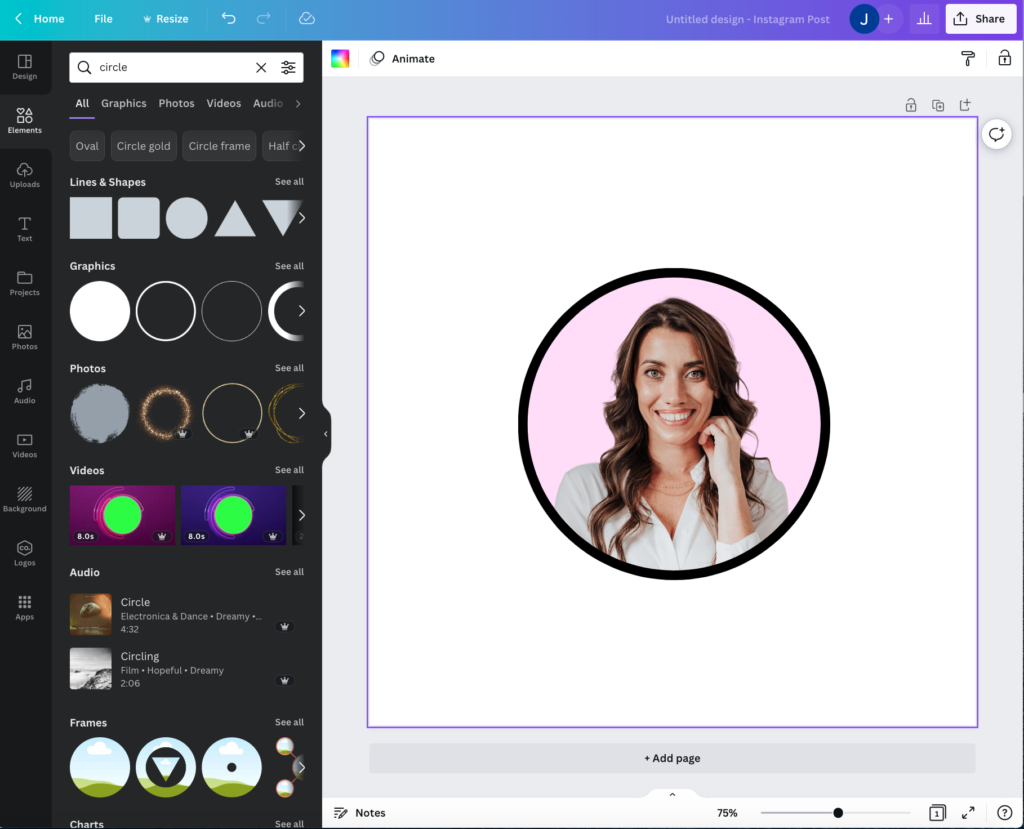
Step 8: Add a border to your LinkedIn profile picture
Another design element you’ll see on a lot of profile pictures is a ring bordering the picture. Again, this can help to make your picture stand out and align with your brand. Here’s how to add a ring (it doesn’t require Canva Pro!)
Tip: Check out the free template to skip steps 1-3.
1. Go to “Elements” in the left-hand menu.
2. Search “circle.”
3. Select the ring border from the graphics.

4. Adjust the ring size so that it borders the frame and background color (if you’re using one).
5. Select the ring and then click on the box showing its color in the toolbar.
6. Click on the “+” box in the upper left-hand corner and pick the color you want.
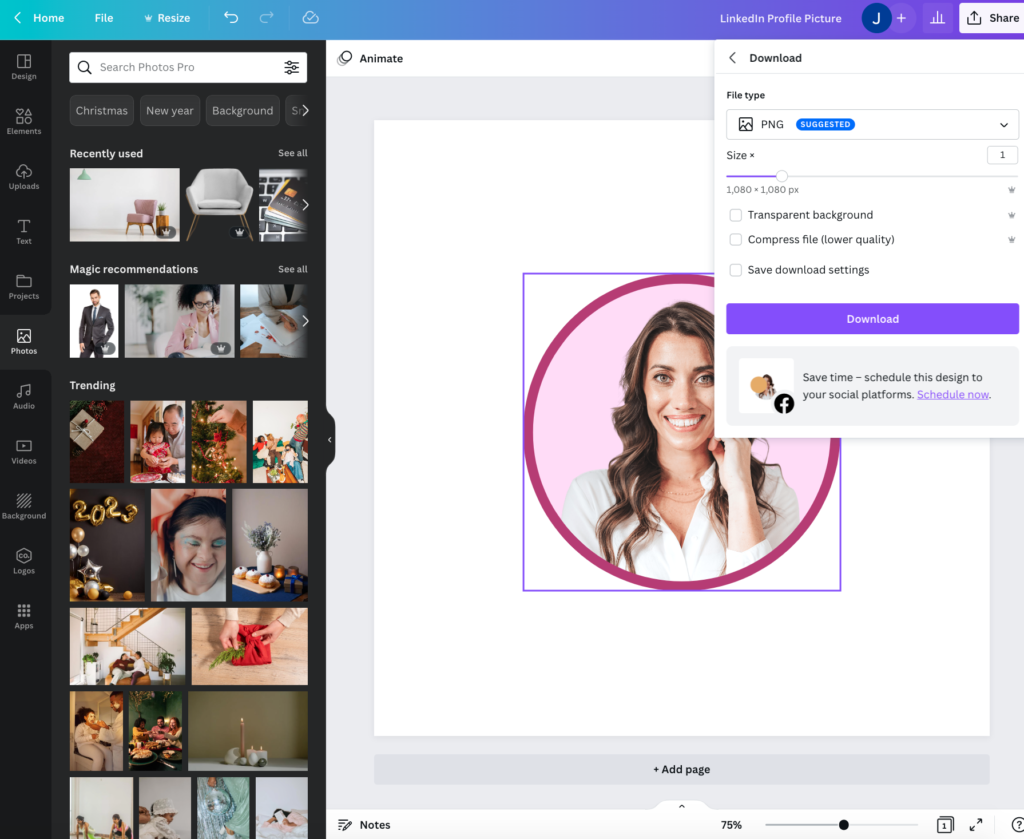
Step 9: Download your LinkedIn profile picture
Once you’re happy with your LinkedIn profile picture, go to the upper right-hand corner and click “Share.” The file type should be PNG. Then, click “Download.” Your picture will then be downloaded to your computer.
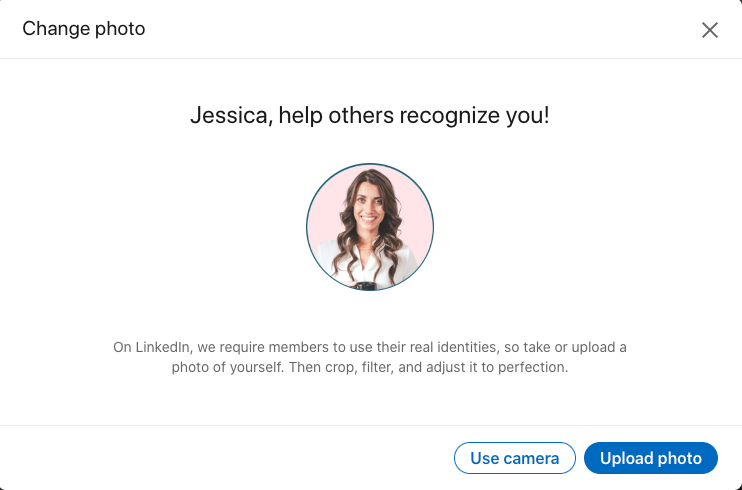
Step 10: Upload your LinkedIn profile picture
The final step is to upload your new picture to LinkedIn. Here’s how.
1. Go to LinkedIn, login, go to your profile page, and click on your profile picture. A box will pop up, click “Add photo.”
2. Then, another box will pop up, click “Upload photo.”
3. You’ll now be able to select the file from your computer.
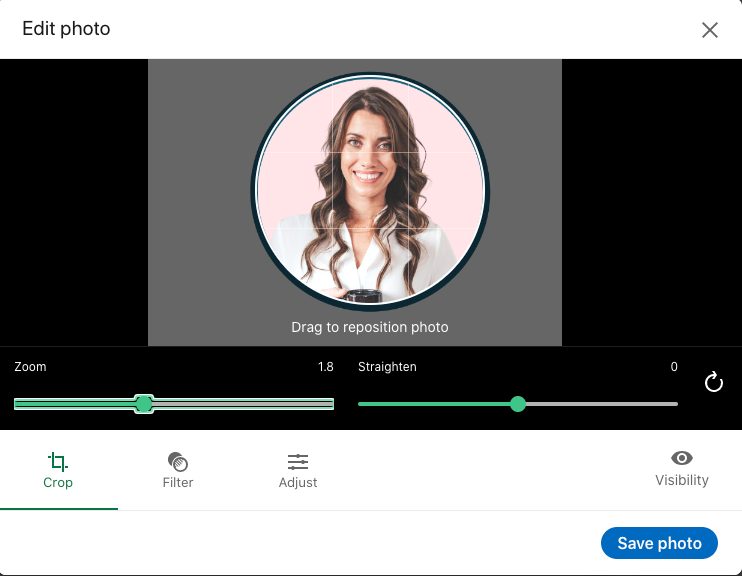
4. The photo will pop up in a circle and you’ll be able to adjust it to fit how you want. It may look something like this to start.
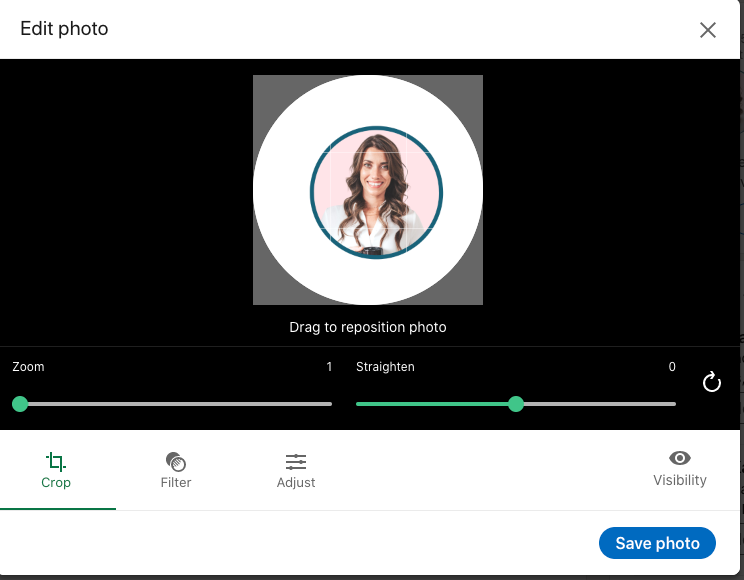
5. Use the “zoom” slider and the drag function on the picture to align it properly.
6. When it’s all set, click “Save.”
Enjoy your shnazzy new LinkedIn profile picture
That’s it! After taking all these steps, you’ll have a professional-looking LinkedIn profile picture that can help you stand out, make the right impression, and get more leads. If you have any questions, feel free to drop them below and I’ll respond.
Ready to get started? Head over to Canva and sign up or log in.
Once you’re signed up or logged in, you can get a jumpstart with my free profile pic template.

Learn more about LinkedIn marketing:
- How to design an optimized LinkedIn banner in Canva
- 7 LinkedIn profile tips
- 5 LinkedIn engagement tips
We also offer LinkedIn profile audits for freelance writers. Get personalized feedback on your profile, written advice, and a list of action items!
Profile picture photo credit: Quincy Phillips